Kategori: Mallar

Caroline in a tealight card

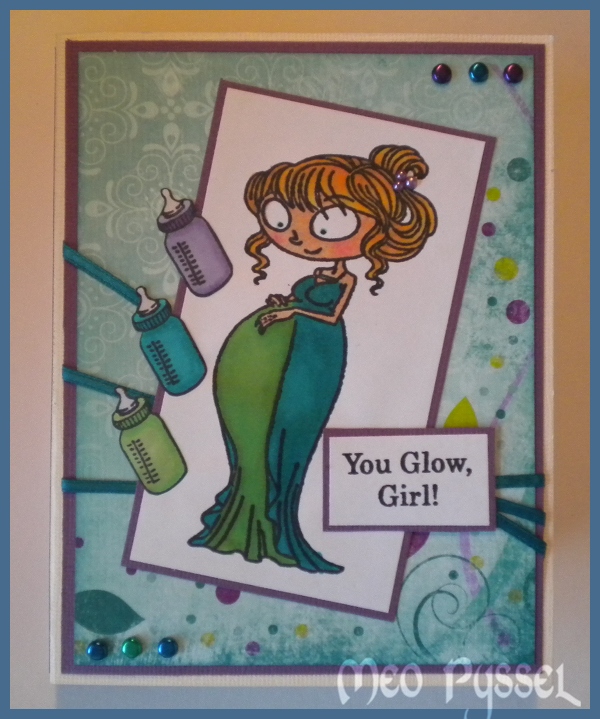
Todays card is one inspired by my pregnant friend, she is expecting her second and I’m really excited. This beautiful stamp landed in my mailbox today so I just had to make something with it. The stamp is Kraftin’ Kimmie’s Caroline. I have used both the main image and one of the texts and the bottle. All the images have been colored with a mix of promarkers and Copics (copics are used on the skin and as one of the three petrol-colors). I did also add some small pearls on her hairclip. The embellishments on the outside is metallic brads and a ribbon i found in my stash. All the papers is Bo Bunny’s Peacock Lane. All the papers have been distressed with either Peeled Paint or Broken China.

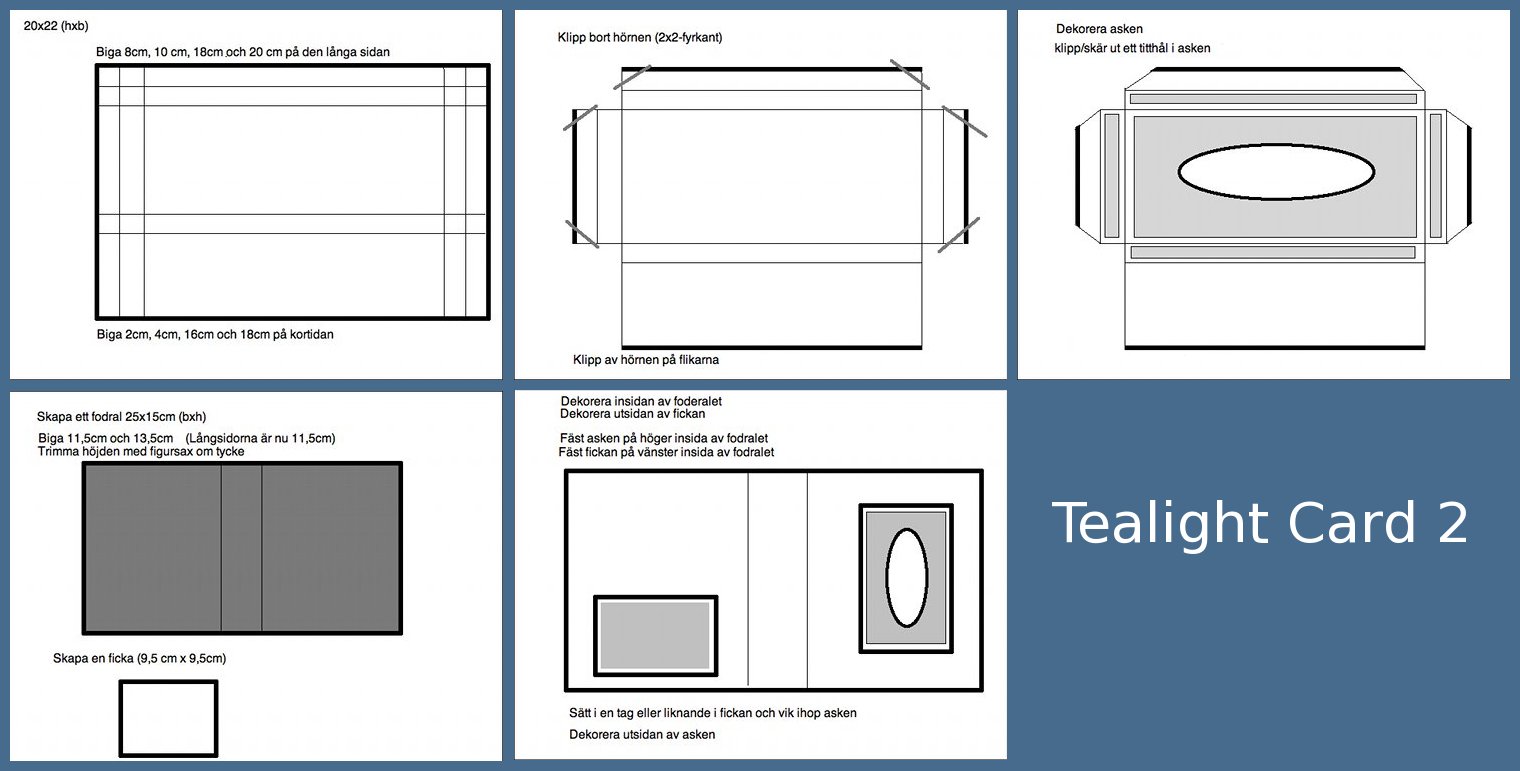
The card is a tealight card, another kind then the one i did the last time. I have made a template but in not happy with it, so i will try to make a better one on a later occasion so bare with me until that. You can find the template at the bottom (click to see it larger). I did another size on my pocket then the template shows because i felt i needed a bigger one. This kind of tealight card I first found the StampARTic site were there also is a very nice tutorial that my template is based on.
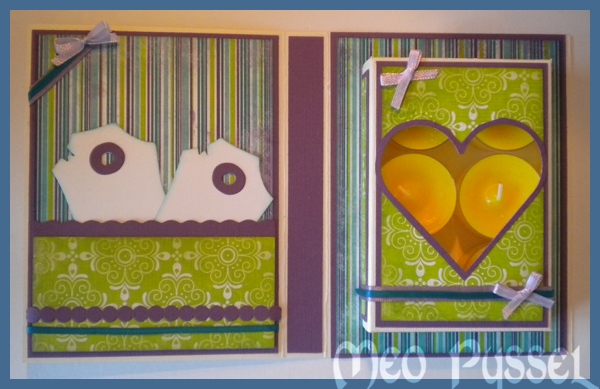
On the inside I used the same papers and ribbon but adding a light purple bow (made with my bow easy). The scalloped edge on the pocket is made with a scalloped scissor. The purple bubbles are a extra from Provocraft’s alphabet Babyface. The heart-window is made with a Nestabilitie, the frame of the heart is made by me tracing around the edge of the die so i just got a bigger thin frame. The tags in the pocket is Magnolia’s Vintage tag the i have distressed with some Broken China.

And by make a mistake i learned something so here is todays tip: Put the panel together first and glue it on the unmounted box, then cut the window and lastly assemble the box. I did the window and the box which made me make the window twice… Another goo thing to remember is that you don’t blue either the top or bottom flap when the box so the receiver can open it.
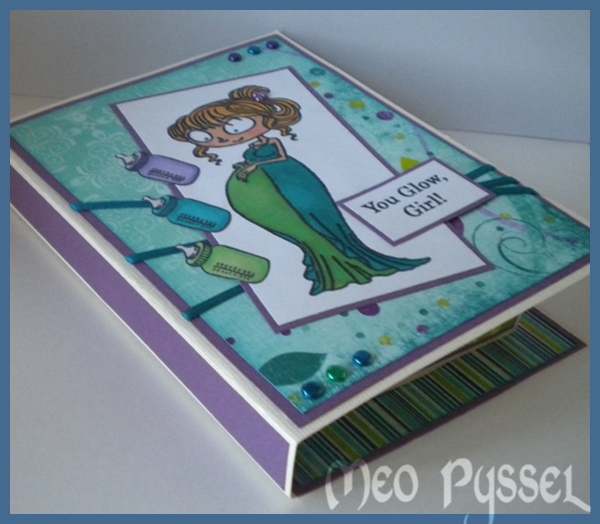
And here is a little picture of the card when closed. Something i don’t like with this kind of tealight card is that the tealightbox is so small that the edges probably will be bent in the mailing-process.

I’m really happy with the colors, but they are very me so it’s not strange. But i had another vision from the start which explains why i have the cream base for my card instead of something maybe petrol or green, but i think it looks good anyway. I’m also entering this card from this weeks Simon Says Challenge that is ”Anything Goes”.
Basic Grey Waterfall card

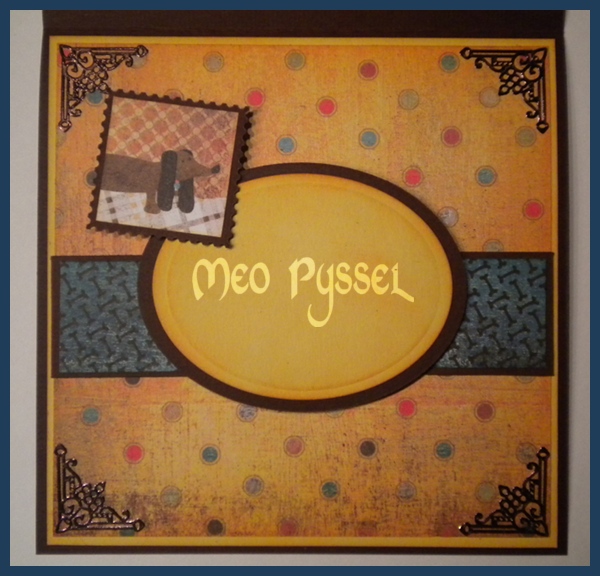
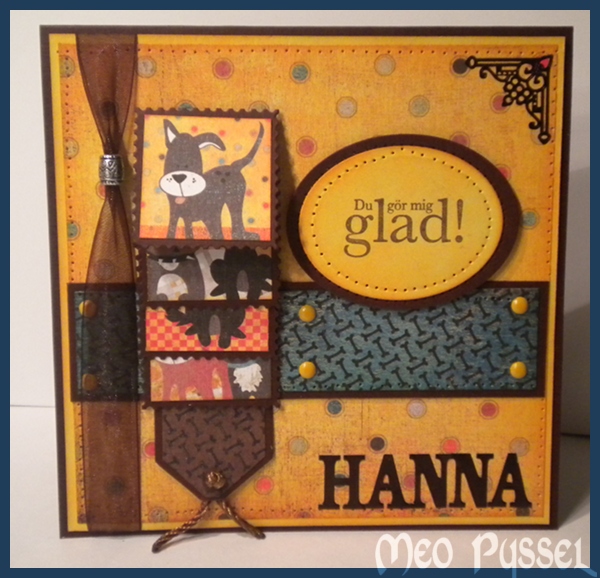
This card is made for this fortnights Basic Greys challenge ”More the one fold”.

All the papers are Basic Greys Max and Whiskers and the images are cut from a sheet from the same collection. I have for a long time been thinking of making a card with a waterfall feature, but not like the normal ones with the waterfall in the middle and that it. So instead i made it as a side-treatment on a regular square cardbase. I do like the look f it but it’s a bit to much of the main feature right now, i will have to keep experimenting. The frames for the images is a Povocraft die, a free sample I got when o bought my cuttlebug, in shape of a stamp.

The Greeting shape is a nestabilities and the corner treatment and the letters (at the bottom front) is Peel-off and stickers that i have colored with a black permanent marker. Even if the marker is black i have found out that all surfaces that is a bit glossy will turn out dark brown. All light papers have been distressed with Spiced Marmelade and the blue paper with Broken China. The Greeting is stamped with Versa Colors 171 Pine Cone.

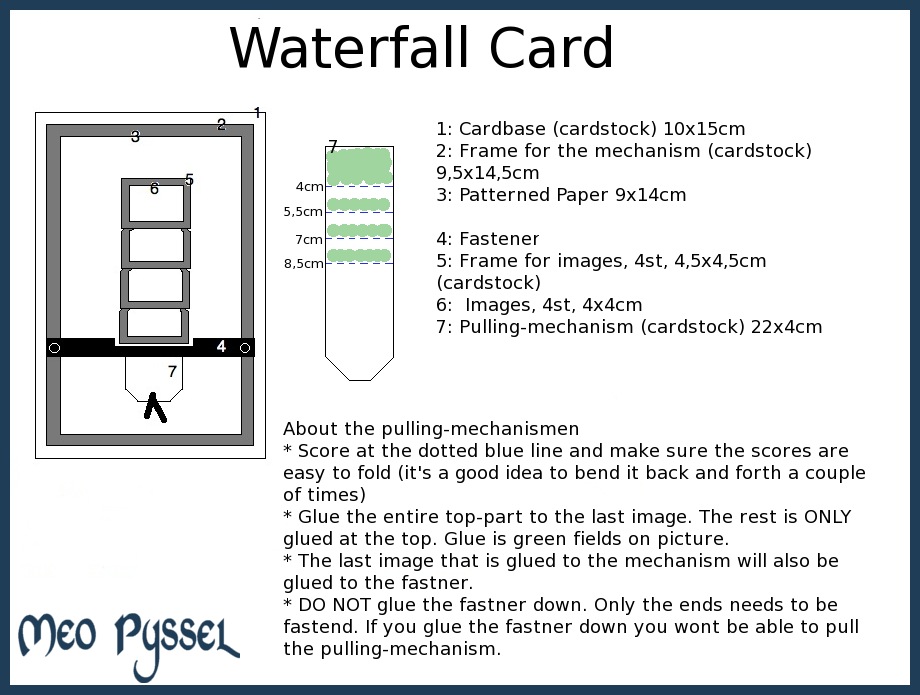
For those that want a waterfall-template i have one (click for a larger image). You can switch all the measurements but keep the pulling-mechanism a bit thinner then the frames. Parts 4-7 is the waterfall-mechanism and can be put on all different kinds of card.

My own Bow-easy

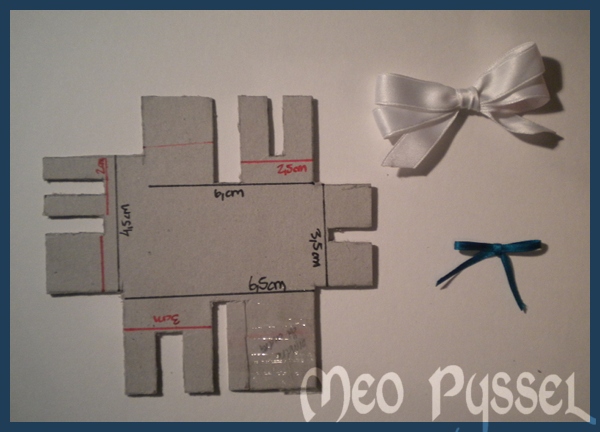
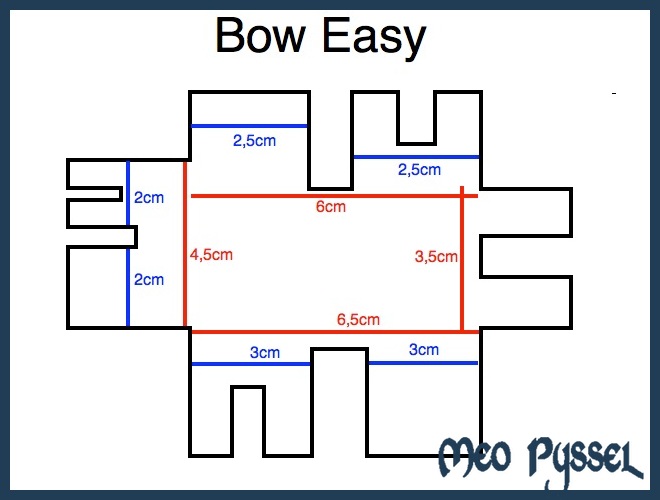
I have for a while wanted a Bow Easy but i think that the hassle with ordering it from UK or USA is to much for such a little thing so I have been googeling it so I could finding a picture with its measurements. I found a couple so I just made my own from a piece of think cardstock (the backing from a paperpad i have). I also made a drawing of the measurements i ended up using so i hope that it can help all you out there that, like me, wanna make your own. The important thing to remember when doing your own is that the block needs to be same size so the bows sides will be even.  I used my beautiful Bow Ewasy to make my first nice dubblebow so I’m as happy i can be. My bow-easy is a bit too thin but it’s still working well. For the next time I make it I think I’ll need to use a thinker cardstock or maybe chipboard.

Jag har under några månader funderat på att köpa en Bow Easy men på grund av frakt, besvär och ”inte i lager” har jag int eköpt den och jag har funderat över hur vida jag kan göra en själv. Jag googlade bowEasy och fick fram ett par bilder som hade måtten utskriva (i inches) och har efter det gjort en egen ritning i cm som jag sedan gjort från en bit tjock kartong som var baksida på ett av mina pappersblock. Jag är mycket nöjd med hur det blev och jag lyckades just knyta min första dubbelrosett så jag är lycklig. Jag har även gjort en ritning med de mått som jag använt för den som vill göra ett försök på en egen. det viktiga att tänka på närman gör en egen är att komma ihåg att blocken skall vara lika stora för att få lika stora sidor på rosetterna.

Detta är även bra nyheter för min sambo som i vanliga fall brukar stå för fingrarna som jag knyter mina rosetter om.

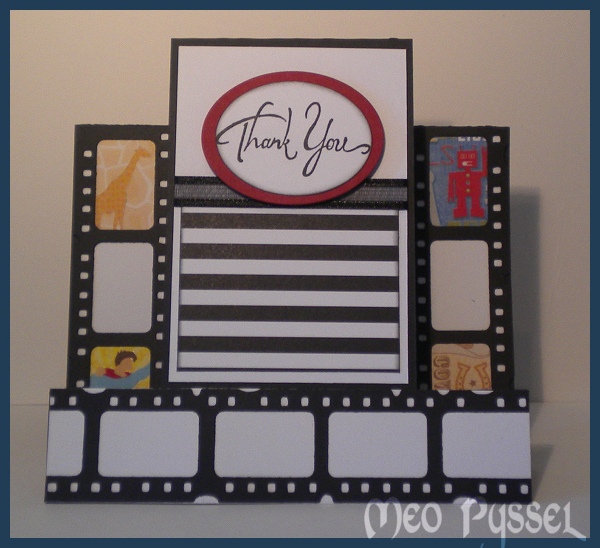
Filmstrip: Thank You

This card is made as a thank-you-card for my friend that help me download new and exciting episode of my favorite series. The Card is a stepcard with a one center front panel. I started out with making a lots of filmstrips with my Tim Holtz Filmstrip Frames and then i picked some papers from DCWV’s All About Boys stack that i used as stills from different films. After putting them together i realised that the colors were very diffrent and that it would be very hard to make a nice colored cardfront to it so i choose to make the rest in black and white with a hint of red to coordinate with the superman cape and the robot.

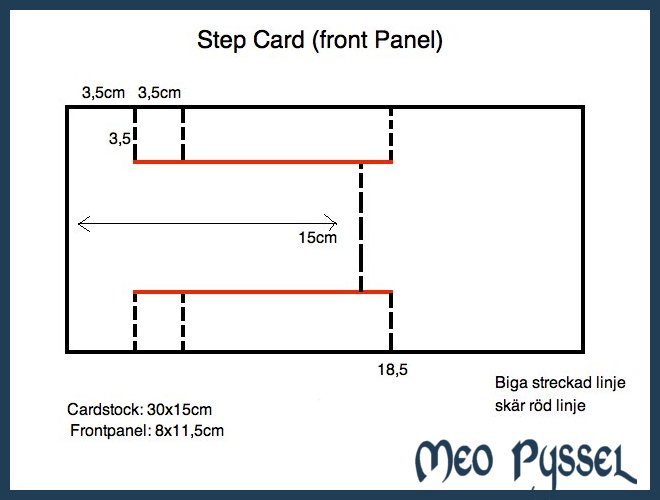
I did google a lot to get the measurements right on the card but i wasn’t happy with any of the descriptions so I made my own. I wanted the folded card to be a 15x15cm card so i fitted the rest to that measurement. You can change all the measurements but the tip is to make the first folds at the sides the same width so that the card can stand steady. Click the image to see a bigger picture or to copy it. Hope you enjoyed this one.

Presentbox: del 1

Idag skickade jag in mitt examensarbete och har därför börjat göra 3 st presentboxar för att tacka de tre personer som hjälpt mig och sett till att jag faktiskt jobbar.

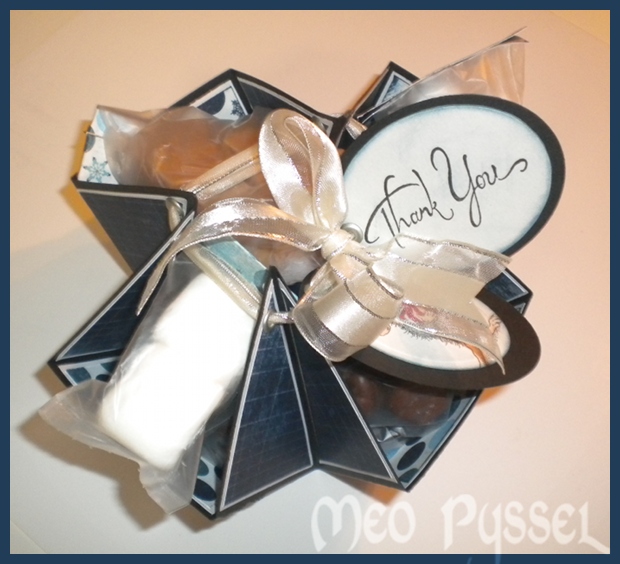
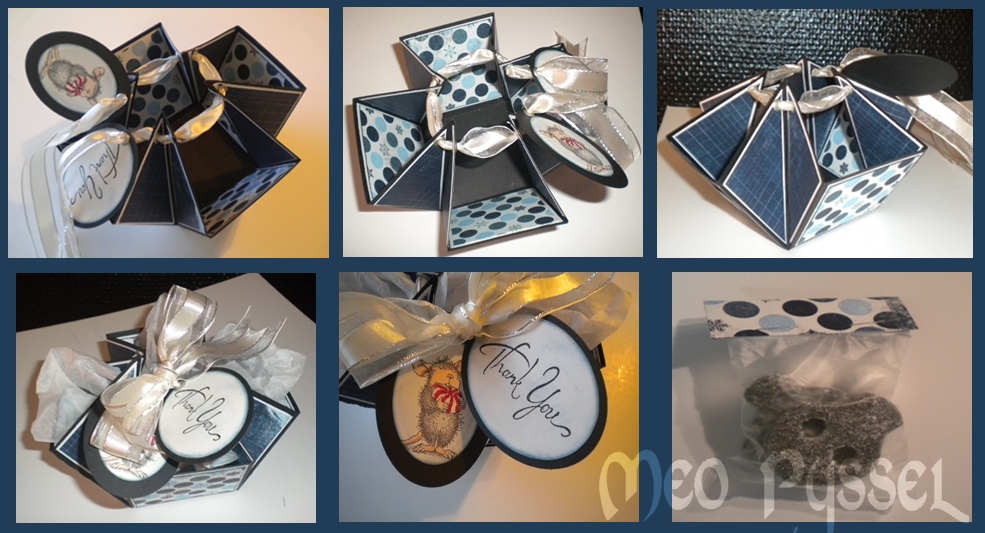
Den första är till min kära styvfar. Pappren är BoBunnys vinterkollektion Midnight Frost. Jag har fäst 8 st öljetter i varje hörn och trätt bandet igenom dem. Jag satte öljetterna alternerande från fram och baksida så att när man följer bandet så ser man enbart framsidorna. Stämplarna är en textstämpel av okänt märke och musen är självfallet en housemouse. Jag köpte lite godis och la dem sedan i plastpåsar och vek över en bit av samma papper som jag använde till boxen. Etiketterna är svagt distressade med Faded Jeans och utstansade med nestabilities.

(bilderna kan förstoras genom att klicka på dem)

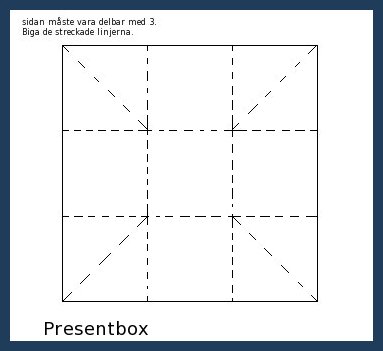
Jag såg denna presentbox på Splitcoaststampers youtubesida, kallad treat box. Jag har använt måtten som används i videon, men man kan använda olika kvadrater så länge sidan är delbar med 3 (då man bigar varje sida på en tredjedel och två tredjedelar. Min box var från början en 21x21cm kvadrat och jag har bigat på 7cm och 14 cm på båda sidorna så att mitt papper blev indelat i 3×3 rutor. Sedan bigas hörnen på diagonalen. Sedan tar man tag i hörnen och drar dem in mot mitten. Se ritningen under och bilderna så förstår man nog.