Etikett: WeR MemoryKeepers/ Lifestyle Crafts/ Quickutz

Die-Storage

Past Storage

So I have redone my die-storage, again. I have always had my dies in an hardcover folder with the collecting-cards inserts for my small dies and some magnetic sheets for my spellbinders and other thin dies. For a while I did put some of the thinner ones that I used the most on the wall but the folder was always present.

What I liked with the folder wad that i could have all dies in the same place (except the Tim Holtz’s big dies) and I could flip through the pages to look at what i have. The easy access and the visibility is really important to me. The bad this is that the folder was really heavy and that the magnetic sheets (even if they were really thick) wasn’t really strong enough and the dies sometimes came of and the dies then fell out all over my crafting space. The plastic inserts for the smaller dies was open at the top so they also fell out from time to time so I really didn’t like to pull out that folder.

I did buy the Crafters Companions folder with the magnetic sheets and thought that they might be the thing for me. I like that the container was closed so that of a die fell loose it wouldn’t get lost. But I really didn’t like the pages, they were too thin. When i flipped a page the page was thin so it warped a bit and the dies fell loose (I had the same problem with my own folder until i found really thick magnetic sheets). Big disappointment after all the good things i have seen about them online.


New Storage

2014-01-15, 1
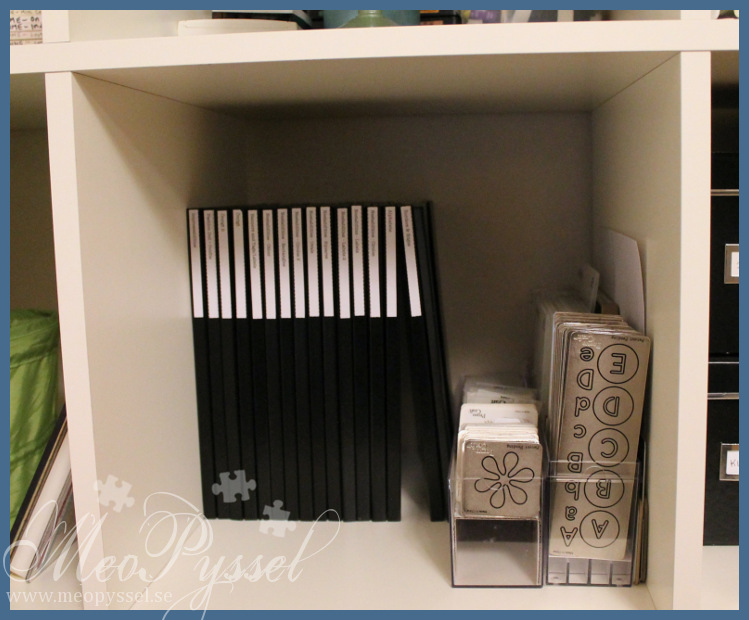
I have for like forever love Quickutz magnetic storage system but first I had a problem with the pricing due to the fact that shipping would be very expensive, and when I deiced that it would be worth it I couldn’t find them anymore. But a couple of month ago I stumbled on the Magnetic book from lifestyle Crafts (former Quickutz) on Scrapbook.com and was just thrilled. I bought myself 7 books and I thought that would take my dies and maybe give me two empty ones for coming dies. Well of coarse I was a bit delusional because I filled up all 7 and still had a lot more dies. So Right before Christmas i ordered 10 more and due to the fact that my dear father went on a business-trip so I didn’t need to pay international shipping (yay!). I just love how sturdy the books is and that the magnetic is just the perfect strength.

I can’t have all dies there but I don’t acre because I love them so much.And luckily I found nice storage for the other dies also. When I was looking through my odd boxes and bins I found the old plastic container for my copic-starter-set (72 pens). The two halfs gives me enough space for all dies and all embossingfolders, and there is more space for coming dies. For the smaller dies I just cut a bit cardboard to get them up a bit. The thought is that I will dress the boxes up so they look a bit prettier but thats for another day.


Labeling

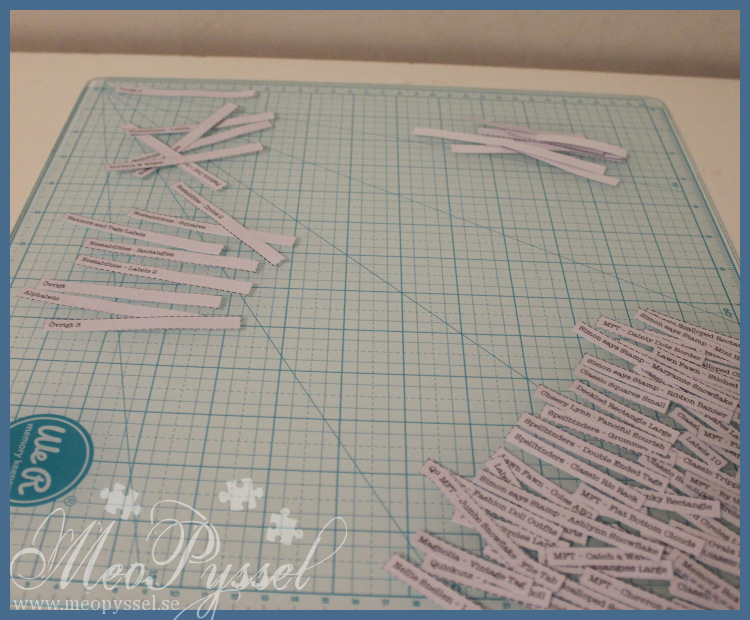
So for the last couple of days (everything goes a bit slow with our angel) I have made some labels so I easily can find with dies I have in which folder.

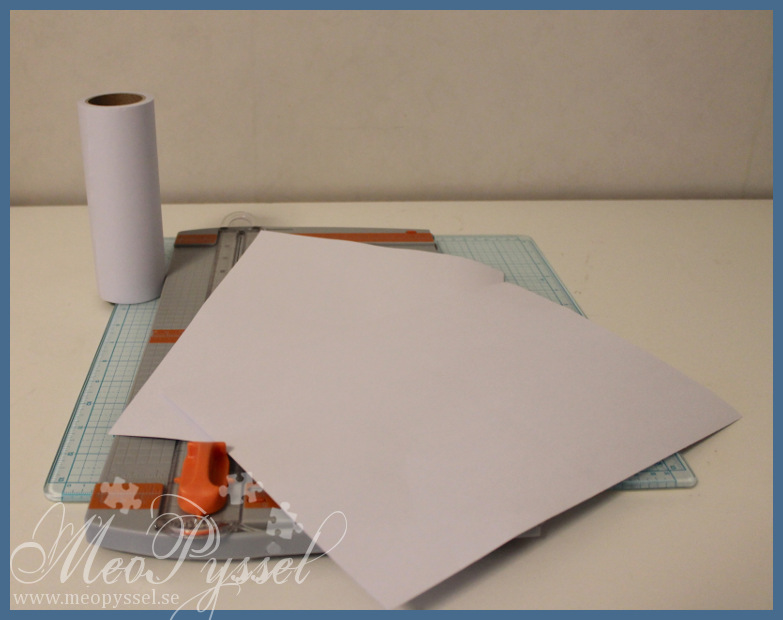
I have used my Ecplise masking tape as my labels. I like that the adhesive aren’t to strong so it won’t leave marks if I wanna remove it. My tape is 15cm wide so I made and Word-document-template with an A4-base. This way I could print the labels and I wouldn’t need to read my handwriting. The template i made is found here. After that I dressed my A4 with the masking-tape and printed.

2014-01-15, 22014-01-15, 32014-01-15, 42014-01-15, 5
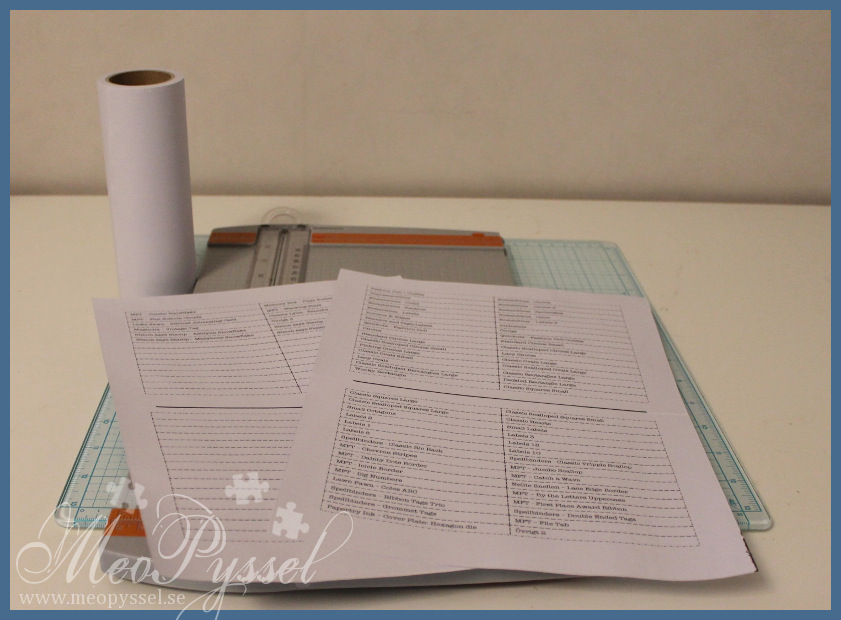
Then i cut out all the labels with my papertrimmer. If you are careful when you line up two of the edges when you put the masking-tape on it’s really easy to cut. If you don’t you need to eyeball the cuts.

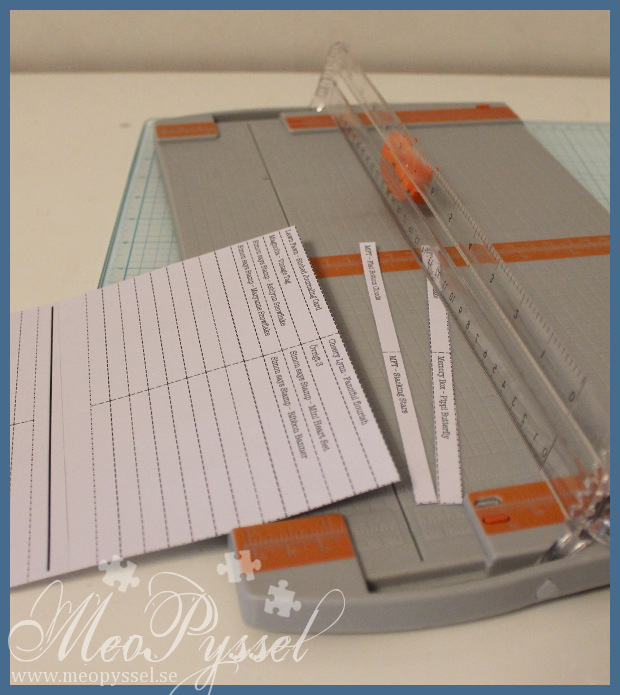
Then I cut my labels in two ways. The labels I wanted for the spines of the book I left in full size. The ones I wanted inside the books I cut down to just fit the name. I did this way because I wanted the spines on the books to look consistent but on the inside i wanted to save space.

2014-01-15, 8
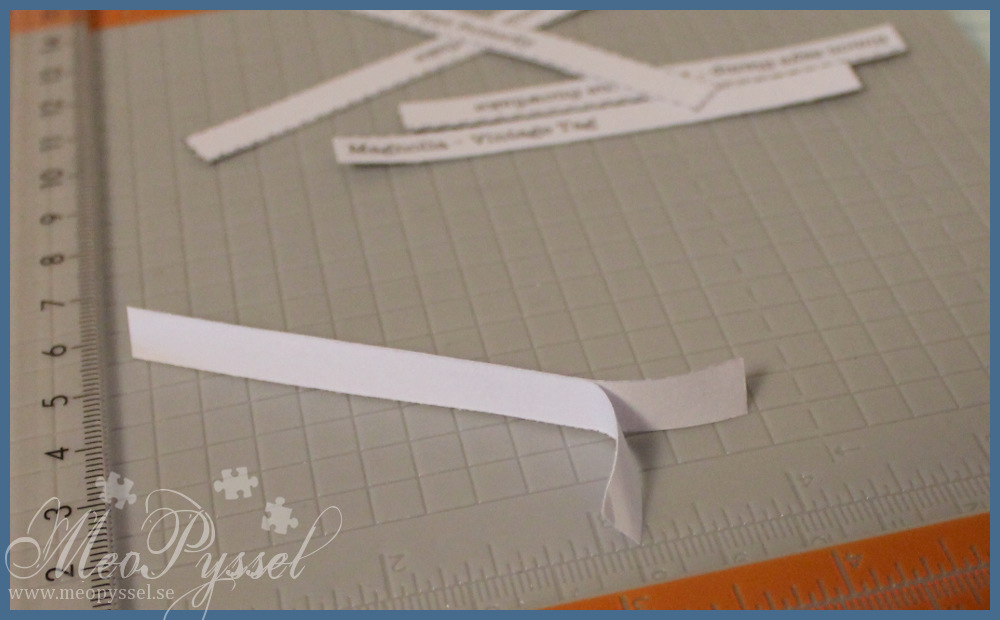
Then I just needed to peel of the printer-paper. If you have nails or a tweezers it’s really simple, but tedious if you have lots of them…

2014-01-15, 7
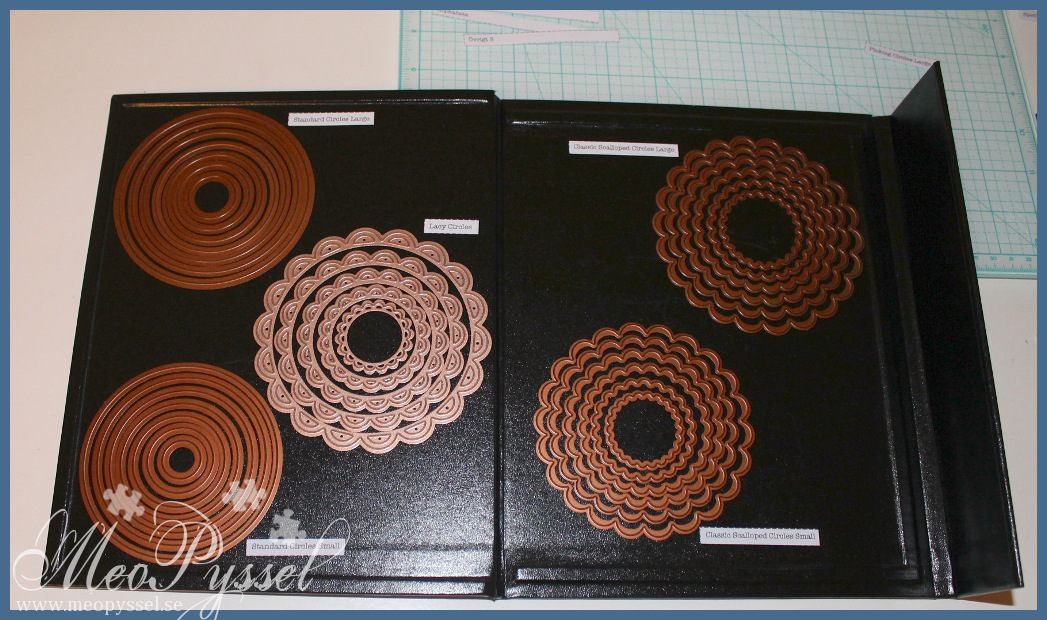
On the labels on the inside I named the dies in two ways. I some books I have all Spellbinders and then it says so on the spine. If that is the case I just put the name of the die on the inside. If it’s a book with various dies (like my alphabets) I put both the manufacture and the name on the label. So here comes a shot of one of the insides also.

2014-01-15, 6So that was all for this time and next time I hope I’ll made a card…

Träffar: 66

Earthy Sympathy Bugs

I have for a long time wanted to use the Sympathy Bugs from Wee Stamps, but every time i start out coloring I have to put them aside to complete another project. But finally I used them. This card is for a fellow teacher at my school that turned 50 last week. But this Monday we will celebrate her so I volunteered to make the card.

I colored the bugs to match this beautiful papers from Basic Gray’s collection Cappella. I just love the feminine tone of the papers and the patterns, without it getting to girly. All the papers have been inked with Memento’s Rich Cocoa, I also sew around the edges with a cream thread. I still haven’t gotten the hang of the sewing. I doesn’t get straight and i have a hard time to see when I should stop at the corners, but i could cover up the worse mistakes. I used this weeks sketch from Sketch Saturday and jazzed it up a bit. The sketch is very like how i start out most of my cards, and also very similar to the one I did for Theo last week so I tried to add some interest by not letting the lower part go all the way to the bottom.

To frame my bugs I used the Lacy ovals from Spellbinders. The bugs are actually colored on a separate piece that I then cut out and glued onto the oval. I really like how the wings got dimension like this, they don’t just go outside the frame, they also goes up a bit. The edge of the oval have been distress with Antique Linen and paper pierced.

I have embellished the cards with one of the corner-treatments from provocraft’s vintage die and some brads from my stash. The decorative edge at the green paper is made with the my edgeabilities; the border is from the classic triple scallop and the insert is from the classic Ric Rac. The bow is tied as a Nellie knot and the button on top is from the basic gray set Hello Luscious. The sentiments or rather the letters are from Quickutz’s alphabet harvest. On the bugs antennas and the wings I added some diamond Stickles, and on the flowery puffs I painted with some pearl Glimmer Mist so add some glitter and glimmer.

The inside is made with the same papers and the same idea, just switching up the colors a bit.

Stamp: Wee – Sympathy Bugs

Paper: Basic Gray – Cappella

Copic: E79, E74, E71, Y21, YR20, E05, R20, R000, E07, YG67, YG63, G24, YG93, YG91, E40, E41, E31, 0

Dies: Spellbinders – Nestabilities – Lacy Ovals, Large Oval. Spellbinders – Edgeabilities – Classic Ric Rac, Tripple Scallop.  Provocraft – Vintage. Quickutz – Harvest.

Other: Memento – Rich Cocoa, Distress Ink – Antique Linen. Stickles – Diamond. Glimmer Mist – Pearl.

Träffar: 457

Soft Peachy Tilda

 Last week I decided to practice coloring fold, simple folds, and i choose this nice Sweetie Tilda from Magnolia to practice on. I have also for a long time been wanting to use my YR00-YR02 for this nice peach-color so I got on with it and this is the result. I’m really happy with the bottom-part of the dress and the hair but I should had made the belly-area a bit darker, but that will have to be for the next time.

After little Tilda’s dress was done I went looking for papers that would fit and I found this collection from Bo Bunny called Kitchen Spice. I think these papers are just beautiful with it soft and at the same time vibrant tones. I tried to match the hair and shoes to the paper and then making a dotted background (that I went a bit overboard with) to match.

As I’m not use to working with light colors like this I decided to try to use some flowers to get a easter/spring-feeling. And for being to things I’m not that comfortable with I’m very happy with how the card turned out. I have to admit that i just couldn’t chose a lighter cardstock, i still needed contrast but i still think it feels bright and light. I have no idea what brand the flowers are but i bought them in the Magnolia-shop in Borås like a year ago i think. I really like their color and shape.

The greeting “påsk” means Eater in Swedish and I intend this card to be an easter-greeting for one of my grandparents, I haven’t decided which ones yet. I’m not that into the whole Bunny-themed easter so this card is more of how i view eater, spring but still a bit chilly:). The letters i used is from Quickutz alphabet Harvest, which I love the look of. But i do hate the die (in my cuttlebug that is)… I never get it to cut everything so i always have to go over it with my knife. And i have tried like dozens of was to sandwich and fill out with cardstock but nothing works. If anyone has a tip I’d LOVE to hear it! I would like to use this die more often…

Stamp: Magnolia – Sweetie Tilda

Copic: YR02, YR01, YR00, YR000, E49, E29, E93, E11, E21, E51, E29, E39, E35, YR23

Paper: Bo Bunny – Kitchen Spice

Dies/punches: Spellbinders – Nestabilities – scalloped and normal circle. Nellie Snellen – Borders. Artemio – Butterfly 3 (small). Quickutz – Harvest Alphabet.

Other: Sakura – Gelly Roll – white

Träffar: 744

Welcome to the world Theodor

This card is a celebration for my best friends new baby boy Theodor. He was born on the 12th of august and i can’t wait to see him!

Earlier in the week is was by CiLi in Papers and bought some of the new Bo Bunny paper packs and my eyes fell on the Kaiser Kraft’s Party Animals paper pack and i couldn’t leave without it. I fell in love with the colors and that you can make any kids card with it without a problem. I have been thinking of making a card for little Theo for a while so i deiced that the Party Animal paper were perfect for it.

I used this weeks Simon Says Stamp challenge for the layout.

I used some regular black adhesive pearls for the embellishments on the right side of the focal and some glitter pen on some on the banners, one of the elephants and some of the small banners on the border. The banner with holds the sentiment “välkommen” (welcome in Swedish) is made by cutting out some small banners on a banner-paper in the collection and then gluing it on a black mat and adding the letters. The letters used in the banner is from Provocraft’s Baby face alphabet and the letters on the focal is from Quickutz’s Harvest alphabet. The backing on the “Theo” is from the die-cut-sheet and it’s backed on black as well.

There is only a photo of the front today when my camera have gone into hiding and i can’t find it anywhere so this picture is taking with my phone.

papers: Kaiser Kraft’s Party Animals

dies: Provocraft’s Baby face alphabet and Quickutz harvest alphabet

Träffar: 118

Superman-card

This card is for my friend that LOVES superman and batman, and he happens to have his birthday this weekend.

The papers that i used  is from DCWV’s All about Boys stack, that i actually bought just because these two sheets. Both papers had parts of glossy images, the superman is glossy on the yellow paper and the red words are glossy on the word-paper (and thats why it’s hard to get a good photo of it). I did follow this weeks Sketch Saturday layout and keept very true to it.

The tag on top is created with regular cardstock, Double Do’s alphabet die and Quickutz tag toppers die. The letters are yellow foam, but it was a bit to light to i colored the surface with Y08 to make it darker. I then punched out three holes with my Fiskars handpunch. The word that is put at the tag is the Swedish word for congratulations..

The embellishments on this cards is simple different kinds of ribbon and some minibrads.

Paper: DCWV All about Boys-stack (6×4″)

Copic: Y08

Dies: DoubleDo alphabet, Quickutz tag toppers

Other: Fiskar’s hand-punch

Sketch Saturday – layout

A spoon full of suger – # 161  Create a tag

Träffar: 97

Pink Flower Lady

Todays card is made with an focal that I experimented with yesterday using emboss-resist-technique.

The focal image is first stamped with Gina K’s timeless textures, with Versa Colors 152 Ash Rose, the script stamp and then i clear-embossed Hero Arts Flower Lady. After that the entire imaged got heavily distressed with milled lavender. I did the same thing with the label, that is the Quickutz die labels, and i stamped two small hearts on it with the Ash Rose again. The cards background is a simple white cardstock that have been teated with provocrafts embossingfolder Victoria and then lightly distressed with some more milled lavender. The bottom edge, bot white and pink paper, have been punched with Fiskar’s border punch scalloped circles. The flowers are simple white Reprint papers that has been embellished with some small pearls. The ribbon that is used is a pink multi-colored one that i think match both the dark and the light pink. The dark pink cardstock is a bazil bling one which makes it a bit hard to get a accurate picture of the color but it works really good together with the ash rose and milled lavender. The card is a 15 x 10cm, very close to an A6.

The cards layout is from this weeks Mojo Monday (#192). I didn’t change much but I’m happy. I’m also trying to enter this month Hero Arts challenge for the first time.

Träffar: 122

Storage for Nestabilities

When I’m making my cards and whatnots i have realized that i always uses at least one nestabilities and that it is a problem right now when my way of storing them aren’t working with having them on my desk at all times. RI have been storing them inside a folder with all my dies. The nestabilities is put on a magnetic sheet that is glued to a paper. At the same kind of magnetic sheet i have my Quickutz Fashiondoll, the alphabet and so on. I decided not to relay on magnetic tape for my folderstorage because i think that the tape is to bendeble and the nestabilities then falls of (tape is good for a hard surface). My cuttlebug dies i store in plastic sheets for trading cards, very cheep in any bookstore, you can see the different storage-ways on the pictures to the right (click for larger pictures).

I have been thinking of put a hook into my wall to put the most used nestabilities but i my lovely boyfriend made me realize that i would go insane when i couldn’t get the smaller on out without removing the larger. After a while i decided to keep on with the magnetic so i put up some strips of magnetic tape. I have chosen to only put up the ones i use the most, the rest will stay in the folder.

I’m really happy with having these nestabilities so close and as i finished a inside for a card i enjoyed the space on my desk!

—————————————–

Jag har efter mycket om och men insett att min pärm med dies alltid ligger framme på mitt skrivbord eftersom att jag alltid anväder någon sorts die när jag pysslar. Meningen från början var att få undan mina dies från bordet genom att ha dem i en pärm. Jag förvarade mina nestabilities på magnetiska ark och mina mindre dies i plastfickor för samlarkort (finns på alla bokhandlar men jag har köper mina på Bokus då de är billigast). (klicka på de små bilderna till höger för att se hur jag förvarar i min pärm)

Eftersom att jag inte vill ha pärmen framme hela tiden så har jag funderat på alternativa lösningar. Jag började med fundera på vilka dies som jag använder mest och tänker försöka ha just de tillgängliga medan de mindre använda får stanna i pärmen. Nästa steg var att komma fram till hur de mest använda diesen skulle få plats vid bordet. Jag funderade länge på en krok där jag helt enkelt kunde hänga upp dem men min kära sambo påpekade att jag skulle bli vansinnig när jag måste flytta de större för att kunna ta fram de mindre så den idén kasserades. Tillslut bestämde jag min för att strunta i eventuella skador på tapeten och sätta upp remsor med magnetisk tejp på väggen och på det sättet fästa mina nestabilities. Jag har inte använt tejp i min pärm eftersom att tejp på ett pappersark är böjligt och när man vänder blad så ramlar nestabilities diesen av men på ett hårt underlag såsom min väggfungerar tejp utmärkt.

Jag är grymt nöjd med mina nya lösning och det känns bra att ha mina vanligast dies inom räckhåll.

Träffar: 58

Mojo 181 med Sagan om våren

The papers that are used are from Pion Design and the kollection is called Sagan om våren (in translation “the tale of spring”). The motive are framed by nestabilities scalloped circle and then i have punched out the holes with my fiskars handpunch 1/16″. The lacy border is also a fiskars punch, a border punch, and i did use the leftovers after the punching to the steam or branches that is instead of the blocks in the sketch. I also switched the embalishments under the motive to text that is made from Quickkutz alphabet harvest. (Vår=Spring). The green paper that is added in the corner is embossed with Cuttlebugs embossingfolder Victoria. Around the edge of the bunny i have also distressed with Antique Linnen.

————————————————————

I dag har jag lekt lite med Mojo mondays veckoskretch och mina nya papper (jag var ju tvungen att fira mina pappersställ) från Pion Design.

Jag har valt att göra ett vårkort till min farmor och farfar. Jag har tagit bort de vertikala blocken från ritningen eftersom att jag inte kunde hitta något snyggt sätt att få in dem. Jag bytte istället ut blocken mot ett mönster av brun cardstock. De små bitarna är resterna från när jag gjorde spetskanten som löper diagonalt. Kanten är gjord med en Fiskars Border Punch. Ramen runt motivet är en scalloped nestabilities som jag har stansat ut cirklar från med Fiskars handpunch 1/16″. På samma sätt har jag gjort med den lilla kanten på den gröna delen. Jag har skurit pappret med en mönstersax och sedan stansat ut cirklarna. Den gröna pappret är också embossat med Cuttlebugs Victoria embossingfolder. Alfabetet som jag använt är Quickutz Harvest. Runt kanten på motivet har jag distressat lite med Antique Linnen. Alla papper som är använda och motivet, som är ett papper, kommer från kollektionen Sagan om våren av Pion Design. Jag tycker verkligen om den här kollektionen, det är så vårig, ljus och spröd.

Träffar: 113